Friday, January 30, 2015

Den Den Deeeen

I have been loving my little den- it is such a fun little bonus space that I never thought I would be able to afford. And when I say little I mean little...it is basically 6.5' by 6.5'. A tall man can barely lay down in it! Hence why I have no plans to make it a permanent spare room...it can only hold A bed and nothing more. Plus I almost never have out of town guests and my condo building has guest rooms for rent anyway.


I think a better purpose for this room, for me, is storage and crafting! I would also like to build in a really stylish desk (and I eventually plan to finish the shelving and make it look built-in too. Right now I am thinking of something like this:


Super sexy, but the one issue is that the desk would only be 17.5" deep and way too skinny to use as a sewing station and crafting table. However my dad came up with the idea to attach a "desk extender" that folds up on the wall! So the room would function something like this when I need the desk-space, but nice and open for the rest of the time!


Imagine something like this:

Source
So awesome!! A stylish frame when not in use, and additional desk space when I need it!

That is my current plan for the room and I am so excited to get it done! If only I could order perfectly sized pieces of wood online :). And then of course I would need to pick colours for this room. Ugh, Impossible. I alternate between bold black and white stripes, grey and coral, and light turquoise. But that is a problem for another day!

Wednesday, January 28, 2015

Bedroom Stylin

A couple weeks ago I mentioned getting a cute little table from Walmart for my bedroom. Well, I finally got around to styling that baby up!


The pillows are the ones from my bed, but this is where they are 75% of the time because I am lazy at making my bed properly. The lamp is new from HomeSense- just $22! It is the perfect size for this little table. The rest of the stuff was things I already owned.

The cord situation is not pretty, but I am LOVING having this lamp because I hooked it up to the outlet that is powered by the room's light switch (which is inexplicably located in the bed nook, under another light switch that powers the actual lights in the room.). Anyway, point is that when you come into the room and hit the light switch light actually comes on!


HALLELUJAH!

Tuesday, January 27, 2015

Making the Front Hall More Usable

I am a creature of habit. When I come home I like to take off my coat, then my scarf and hat, and then take off my boots. However, if you take a look at my floorplan, you will see an issue with taking my coat off before my boots!


See how much of a trek I have to make to get to the front hall closet?! Insanity! Haha, yes, I am aware that this is a #firstworldproblem, but I hated wearing my dirty winter boots across the floor, and I hated wearing my coat while removing my boots because it is so bulky!

As well, I needed some seating in the front hall for sitting on while removing and putting on one's shoes. So after a quick trip to Target (before it closes!), and Canadian Tire for some hooks, I have a much more user-friendly front hall!


The bench has turned out to be very handy, though the cushion is kind meh so I am sure I will sew a prettier one eventually :)


The hooks have worked out awesomely. I like that they are simple and modern, yet sturdy! I had to break out my hammer drill to get them into the cement wall.


I was originally going to do three hooks over the bench, but my stepdad pointed out it wasn't much of a view when you first opened the door, so I took his advice and did two on the wall and just wrapped one around to over the bench. Eventually I will hang some art up too!

Wednesday, January 21, 2015

Le Couch

I got a couch!!!! I know- you were all waiting with bated breath for this, but it is finally chosen. I ended up going with a Stylus Sofa. They are only available through dealers, but they seemed to get great reviews for quality and longevity. I ended up buying mine from a great little store in Toronto- Equilibrium Furnishings. They offered two Stylus Sofas with reversible chaises, and neither were in the store to see in person, but they had a couple other models so I could check on comfort and quality.

I was choosing between the Leif model and the Donovan model. The Leif was smaller, cheaper, and came with the third couch cushion so you could eliminate the chaise. The Donovan was larger, more expensive, and no third cushion. However, I decided I wanted the larger couch! So I put a deposit down and in 2 months this baby will be in my home!


I got the same grey as this photo, by the way. I might look into buying different legs later on, as I think I would have preferred something sleeker. However the couch is great! Sucks that I have to wait two months but it is on back order :(.

I have it taped out on the floor right now, so now I can continue to plan my room around it! We are talking art, rugs, all that fun stuff! Let's hope it doesn't take me 8 weeks to pick those out too.

Thursday, January 15, 2015

Couch Conundrum

It has been 7 weeks since I moved in here and I STILL have not bought a couch. My indecision over the couch is driving me BANANAS. I just want a couch that I can stretch out on! However the "perfect" couch seems to be incredibly elusive.

I want
- light to medium grey
- modern lines
- chaise lounge that can switch sides
- comfy

It doesn't seem that impossible?? However point 3 is kind of the kicker here...but I really would like that flexibility so this couch can last me a long time. Reversible chaises are like the unicorn of the couch world. Le sigh.

Originally I fell in love with the Quinn sofa at West Elm.


I love everything about it, and the price is good...but it is not available in Canada!!! ARGH to West Elm and their limited stock up north!

I have also been considering the classic Ikea Karlstad in Isunda Grey.

The Karlstad with this cover is $1229, but I would also buy replacement legs from Uncle Bob's, which would run a few more dollars. I read that the Isunda Grey cover was being discontinued by Ikea (which is crazy, because it is the most decent cover they have), but I could also order a cover from Bemz. So total cost is probably $1300-$1500...depending on covers.

Pros for the Karlstad is the price, ability to buy new covers if I change my mind, and ability to wash covers.

Cons is that I am not sure about long-term quality and literally needing to take it apart to switch the chaise. From my experience Ikea never goes back together as securely as it originally did. Also, my friend pointed out that this couch sits kind of low? I need to check it out in person.

Lastly, I ended up at Design Republic, which does custom couches. I talked to the staff and there are three options there that can be done with a reversible chaise.

Bennett

Michelle

Wyndham
Out of the three, I really liked the Wyndham the most, even though I can't see what it will look like with the chaise. (PS- I think they might be discontinuing the Michelle? It is on great sale right now and was hard to find on their website).

Pros are that is comes in different lengths, number of cushions, leg type, and you can pick from TONS of fabrics. AND Design Republic can actually make me a third couch cushion so I can remove the chaise completely, if need be. Not really an option for the Karlstad.

Con is really just the price! This couch is $1780- $1980 (78" vs 87"). Plus $200 for them to make that spare cushion.

Thoughts?? I really like the Wyndham...but it is $1000 more and I am a Frugal McDougall. That money could go towards the armchairs I want. Plus I don't know this company too well...I know everything is custom and built in Toronto- but does the quality stand up over time?

And you may leave links for other couches you think I will like- but trust me when I say that I have scoped out every reversible chaise couch available in Canada on the net.

Tuesday, January 13, 2015

Hanging Out

I finally did an update to the bedroom that I have been longing to do for YEARS now, but wasn't sure would fit in my old, tiny armoire- wooden hangers!


Nothing, in my humble opinion, says "I've got my sh*t together" like wooden hangers! I bought a whole bunch at Ikea for roughly $50, so it really wasn't a huge investment, but it makes my closets look so nice and put-together!


My bedroom has "his and hers" closets, which are small closets on either side of the bed. But since it is just me here, they are "mine and mine" closets :). I tend to use the one of the right more, so that has more everyday work and casual clothing. The left one is just dresses and storage.

You may have also noticed a little table on the right hand side- that is new too! $50 from Walmart.ca (though it is saying it is out of stock online)!


It is the perfect little table for this spot. Eventually I'd like to get a mirror in here so I can do my makeup in the bedroom (though the lighting is less than ideal so I would need to figure that out for dark, winter mornings). The table is also handy for storing my bed's throw pillows neatly underneath. I might end up painting the table down the line once I settle on a new dresser (right now they clash but oh well).

Monday, January 12, 2015

A Barley Beige Condo!

I painted my hallway and living room! Yay!! As you know, last week I settled on "Barley Beige" by CIL as my main condo space colour. I wanted something along the lines of a warm grey and it really fit the bill. I picked up a gallon last Monday and painted the hallway on Tuesday. I got another gallon later in the week and painted the rest of the space on Saturday, as I wanted to paint in natural light on those walls. Here are the final photos!

Front Hall
Front Hall Closet Wall
Kitchen/ Laundry Closet
Living Room/ Bedroom and Bathroom Corner

All in all, I only ended up using a gallon and a half of paint (two coats on each wall). There was a LOT of cutting in, but not actually a lot of walls to paint. Another big bonus to having tons of windows!

As for the colour, I love it in the front hall, which gets little natural light, but I find it to be really light in the main space. If you didn't see it next to white doors and trim you would think the walls were still white. I think I would have preferred something a little darker. That being said, the whole space looks a lot cleaner and nicer with this paint vs the cheap white that was thrown up everywhere before.

You may have also noticed I finally hung some art up! I am waiting to hang stuff over the couch so that it will be centered over whatever couch I end up purchasing. In the front hall I also hung my mirror and some hooks for winter garments by the door.


The flower art is actually covering the old intercom box from when my building had buzzers (now it is all through the concierge so this thing isn't even plugged in, but I don't know if I can remove it entirely). Therefore the mirror is a touch higher than I otherwise would have hung it, but I can still easily check my hair before going out now!

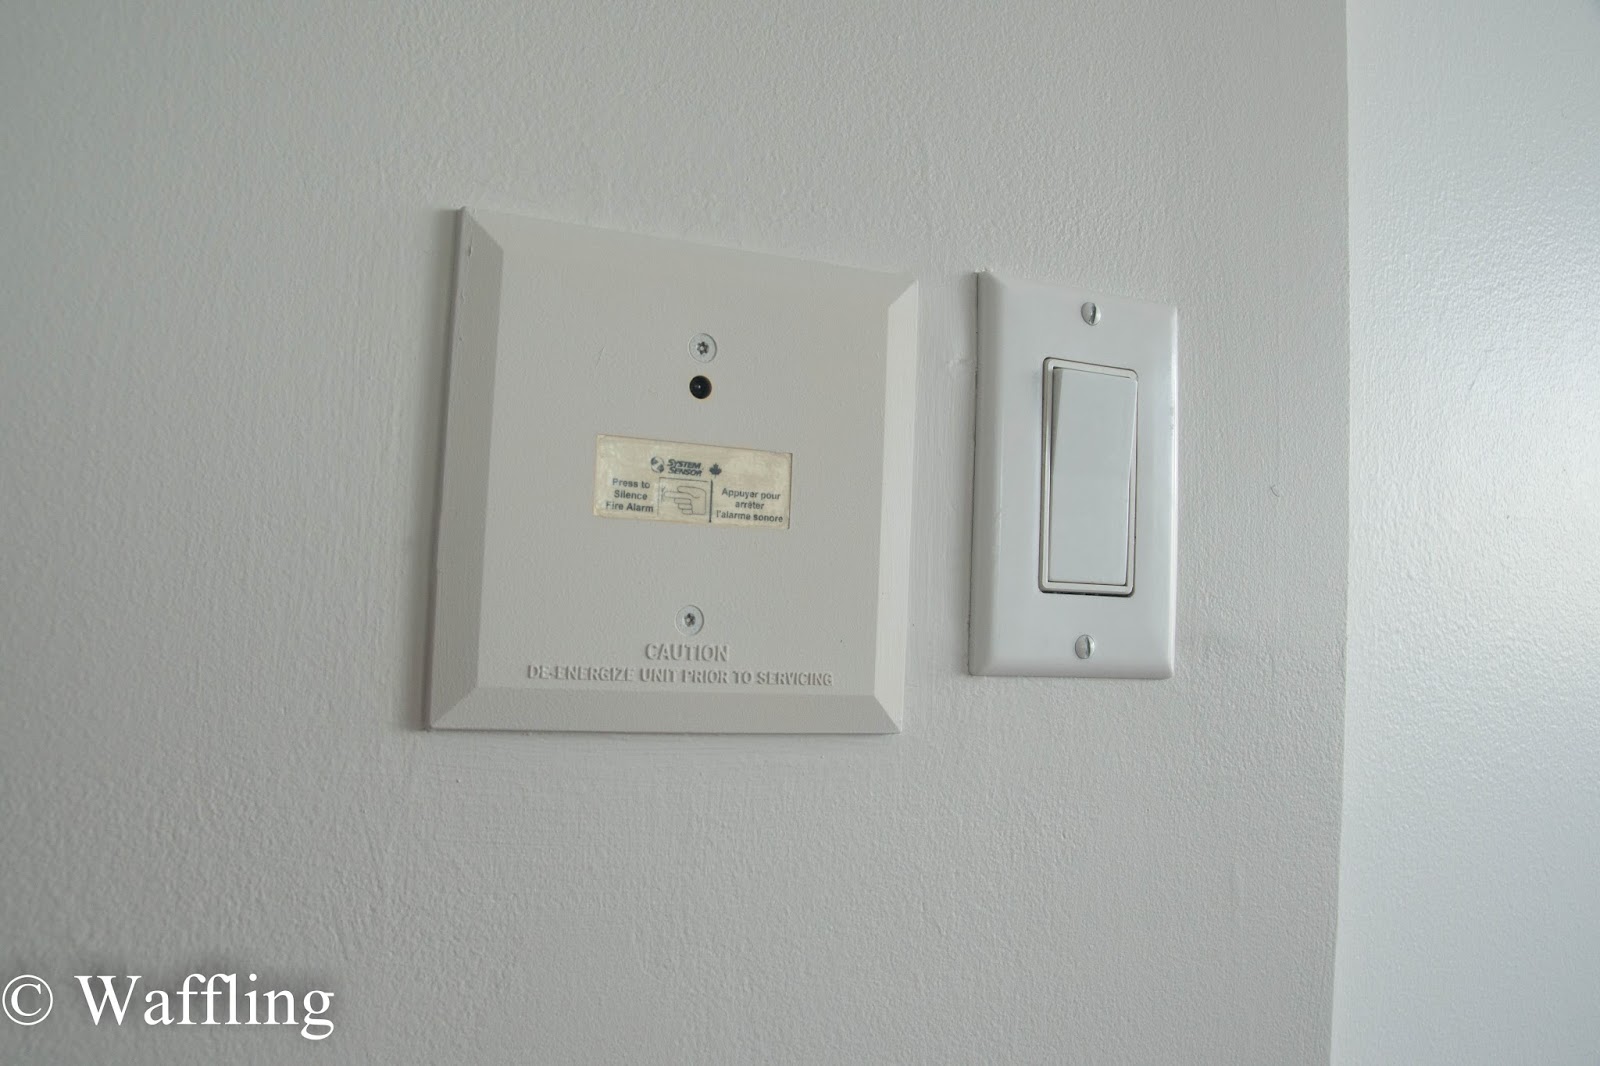
I also took the liberty of painting over some ugly features of my walls. Behind the couch was a yellowed phone/network jack that is now defunct from cabled internet so I painted it completely grey so it blends in. And I painted over my "shut up box", which is a button you can press to turn off the fire alarm in the unit. I had one of these in my old unit and they seem to only come in yellowish ugly tones?

And since I know people will ask- it doesn't permanently turn off the alarm, but turns it off temporarily. When the fire alarm goes off the concierge comes over the system and gives us instructions on whether to evacuate and a lot of the time it is a false alarm and we need to wait for the fire department to turn it off in the building- this button gives you some peace while waiting. And you can still hear the alarm in the hallway and then concierge can turn back on all our in-unit ones if need be. Anyway- now it is much less noticeable at least.


Now all I have left to paint is the bathroom, den, and bedroom- and I already have some plans formulating as to what colours I would like in those spaces. Nice to have at least one major thing done for now. And as for other major changes....there is a couple of boxes in the shot of the kitchen up above- which contain my new dishwasher and microwave that I bought during boxing week sales!! So exciting!!

Tuesday, January 6, 2015

Greige Party!

I knew with this new condo I wanted to warm up the walls a bit and not go grey again this time. I am also not a beige paint person. But I wanted neutral...so enter greige- colours that are a mix of grey and beige. The perfect greige is super hard to find, however!! I went through chip after chip and finally settled on three finalists from CIL:

Barley Beige
Winter Bird
Stratosphere

Then I got me some sample pots of these beauties and slapped up my options on two walls- the livingroom wall, which gets tons of light, and the hallway which gets none.

Barley Beige, Winter Bird, Stratosphere
Stratosphere, Winter Bird, Barley Beige

I totally thought Stratosphere was going to be the winner, but I HATED it on my wall. Way too pink!! And I thought Winter Bird was going to be awesome...but it just looked white! Enter the underdog- Barley Beige! I loved it on the wall! And I hope you agree because a gallon of it is sitting in my hallway (and yes, I know I need more than 1 gallon but this girl only has so many arms and no car).

I still need to pick colours for the den, bedroom, and bathroom, but yay to finally picking a colour for the main space! And since I don't actually have a lot of walls (lots of windows for the win!), I hopefully will be able to update you guys next week with lots of pretty pictures :). OOH and once I paint I can finally hang pictures!! YAY!

Monday, January 5, 2015

Den Progress

I didn't really have time off around the holidays, but I made the most of my evenings to get some progress done on my den! I thought I would be most excited about decorating my bedroom, but this little 6.5' by 6.5' room has really stolen my heart! I was inspired by this old post of Centsational Girl to add some storage along one wall. However, that many bookcases wouldn't fit in my space by a long shot!! So I am modifying it with two skinny Billy Bookcases on either end of the same Besta system.

Inspiration:


The good news is that the white skinny Billy Bookcase is on sale...the bad news is that it won't fit in Cam's car! The Besta system fit just fine since it was multiple smaller units (and was 15% off!), so we got all that home last week and I set it up. I was going to use the underframe that Centsational Girl bought, but it was sold out...however it dawned on me that I am going to trim everything out (like she did), so why not just use the feet that they sell? I got nice feet for the front- because I know I will put off buying and installing that trim- but I just got cheaper feet for the back of the unit.

I currently have one white Billy Bookcase, as someone was giving one away for free on Craigslist and they were within walking distance so I was able to just walk it home with my dolly on New Year's Eve. It is quite yellowed with age, but free is free and I may paint it out or just add a door on the front (Ikea sells nice doors for the Billy system).


Right now the whole space is a little less that photo-perfect, but this is progress! Behind the doors I have shoe storage (!) and craft supplies. I am just loving all this storage- and finally being able to unpack my books and remaining knick knacks. I think I might just leave the tops of the units open for baskets- thoughts? Should I buy the height extenders that they sell?

Oh- and the Billys are not as deep as the Besta units, but I kind of like that they are set back as it is much less visible from the doorway that all those extra shelves full of stuff are back there.


All in all, my new Besta storage system cost me $370 with tax, but I think it looks great and totally worth every penny. And thankfully all Besta stuff was on sale for 15% off! I used the following items (since I know Ikea links don't always work right):
- Besta Shelf Unit/height extension for base (120cm x 40cm x 64cm)
- 2 Besta Shelf Units (60cm x 40cm x 128cm)
- 2 Besta Vassbo doors in solid wood (60cm x 64cm)
- 2 Besta legs (in the back of the unit)
- 3 Besta chrome plated legs (In the front of unit- they come in packs of 2, but you need 3 in the front so buy two packs)

Then on each side will be a Billy Bookcase and the whole system should go wall to wall! Of course, this will involve figuring out how to flip the light switch to the outside of the wall, since the bookcase will cover it. My Dad moved one of his before, so hopefully he will help me :). On the Billys I am thinking of getting these Oxberg doors for $50 each. I also need to get some handles for the Besta's doors at the bottom. I bought the little device to make them push-open doors but I could not get it to work so I gave up.

As for the rest of the room- it is pretty bland. But I did make a sparkly silver cover for my el cheapo folding table!

This was shot with a wide angle lens- do not be deceived on size!

Eventually I will figure out a permanent for a table in here. I want something big for doing sewing and crafting on (I can't see myself ever using the room as an office. Who wants to stare at a wall? However it is a great craft space and I want to get a good table for that. I am toying with the idea of something wall mounted that can be put up if I need to put guests in here or something. I also may hang a privacy curtain on the inside (that can pushed off to the right side, which will also cover the electrical box in there).

I feel I should also mention that I switched out the lightbulb in here (and in the living room) to a warm white vs the existing cool white. I am not a fan of cool white bulbs! Eventually I will upgrade the fixture in here to something pretty, but for now switching the bulbs has made a world of difference.

And lastly- this room needs paint! I am planning on painting it a fun colour- since it is such a small room anyway- might as well take some risks. Maybe a bright turquoise? Deep navy?


Pin It button on image hover