Thursday, May 31, 2012

Ooh, Shiny!

When I first moved into the condo, the fridge was spotless. I mean, it was cleaner than a brand new fridge. I could see my reflection in the plastic drawers!! So I did the appropriate thing and let food rot all over it and never cleaned it. Until now! Yup, it was time to tackle this bad boy!!

Here are the befores (you've seen my empty freezer before)


The freezer was very easy. I just quickly emptied it and wiped it down. The frozen veggies went in the trash, as they were suffering from a severe case of freezer burn. I keep my pitas and english muffins in the freezer because it will take me MONTHS to eat them. I'd rather lose some freshness than buy new damn pitas every 2 weeks.

Clean!
I need to get a shelf for in here. I had one, but I stole it to help store my plates and bowls better. I probably need less ice too- I don't even USE ice!

Then I emptied the fridge. This was the big job, as it involved checking everything for expiry dates. Let me spare you the surprise: EVERYTHING WAS EXPIRED. I am not a condiment/sauce person. I just don't use them. But once in awhile a recipe will call for something like that, so I buy it and only use a bit. Then it sits in the fridge until it goes bad because I got bored of that recipe. This is a problem when you live alone! I think if I planned my meals better, I could be better at this. I would pick different recipes using these ingredients and use them all up before they went bad.

Sometimes you also just buy something to try it, but then decide it's not for you. That's why I had natural peanut butter in the fridge. I hated it. Sorry, I know it is better for you but bleh, I'll take my oil-laden peanut butter any day!

Oh and in case my friends are reading, the cake box is long since emptied. I was just too lazy to take it to the garbage chute. And for those who didn't get to see this before, CHECK OUT MY AWESOME BIRTHDAY CAKE MY FRIEND MADE ME!

This photo does not do it justice
So in the end, all of this went bye-bye:
How long had my ketchup been expired? I've been eating that!
My fridge looked BAD. So gross. Darn vegetables leaking their vegetable juices all over.


So I wiped it all down and took the bins out and gave them a good scrub with soap and water. I also found this mysterious piece of tape:

How long has THAT been there? I guess the previous homeowner had an issue with the top shelf moving? I have no idea. But I left it there in case it was holding the fort together. Didn't want to take any risks.

Then I got to move all my food back in!


Woo, that is a full fridge! Haha I actually used some of the stuff in there for making dinner during this project, so by the time I took this picture it was more empty. But I actually consider this a pretty full fridge. If I have sweet potatoes or pasta sauce, or eggs, I have food for dinner!

You may notice that my nail polish is in that glass container in the fridge door. My friend just recently told me that keeping your nail polish in the fridge helps it last longer! Who knew?

Wednesday, May 30, 2012

Tools of the Trade

When I moved into my first real place after living on the university campus for a couple of years, my dad got me a tool kit. He knew I was useless at anything involving tools, but that when you rent you can't always rely on the landlord so you may just need a wrench or hammer. I have moved this tool kit with me now to 3 different homes and it has lost countless pieces, but it is still one of the most useful things I own.


See how much is missing? Apparently it once held a hammer. How do you lose a hammer?? And where is my wrench? This is why I can't have nice things...

I actually use this tool kit so much that it doesn't get stored in the locker- it sits under my bed for easy access! To prevent it from scratching the hardwood when I pull it out (it is HEAVY) I attached felt pads under it. Practically everything in this condo has felt pads under it. And I have engineered hardwood, which is much more resistant to scratching!

So I thought today I would list the key tools you should have when you move to your first place, and some tools that you should slowly accumulate as funds allow, but are very handy.

Crucial Items

Hammer
It is such a basic tool and comes in handy for so many projects, like hanging pictures, closing paint cans, and breaking ice to make pina coladas

Wrench
There will come a time when you need to tighten a nut- maybe on an Ikea item or maybe for a leaky sink- it will eventually be a life saver

Screwdriver- Phillips head and flat (or slot) 
The majority of screws will be phillips or flat so be sure to have these in your arsenal. You might just want to invest in a screwdriver that has multiple tips and therefore save some space AND always have the correct screwdriver

Needle Nose Pliers
Hair clog down the sink? Jammed paper shredder? Need to pinch annoying people? No problem if you have Needle Nose pliers

Measuring Tape
Sooooo key if you want to make sure furniture will fit. I often go to Ikea WITH my measuring tape!

Level
I use my level a lot- if I didn't all my pictures would be crooked! Trust me, you cannot eyeball it. Get a level


Not Crucial, But Nice Items

Drill
I just got my drill and we are already BFFs. If you want to hang anything heavy, you WILL need a drill.


Power Screwdriver
Ikea bows down to me now that I have a power screwdriver. I use it way more than I thought I would and it makes every project so easy and fast!


Stud Finder
This goes along with the drill- hanging something heavy means you need to find a stud. And I am not talking about sweet-talking some handsome man into hanging things for you! Though, that would work too.

Heavy Duty Stapler
One of these will really come in handy for any upholstery project, like recovering chair seats or making your own headboard from scratch

Socket Wrench
I think I lost my socket wrench, because I don't see it in the above photo, but I DO remember using it about a year ago with my dad. Dad, did you steal my socket wrench?? This tool is very handy for tightening bolts in an awkward spot.

Some Sort of Jigsaw/ Table Saw
I have no saw (well, I think I have a hand saw, but come on), but I would LOVE a saw. I would build a castle if I had a saw!!

Clamps
I don't have any clamps, due to my lack of saw, but they would come in handy for any sort of woodworking project- especially if you are by yourself and have no one to hold the wood steady!


There may be more tools, but that is all I have for now! Currently I am looking to get a giant level so that I can level two objects that are far apart, like two frames. My dad found about 50 levels when cleaning his basement, so I am going to steal one of those. I am also working on building up a collection of screws, because every darn project I start seems to need a different size/type of screw.

What are your go-to tools? Have I missed any?

Tuesday, May 29, 2012

New bedside table

I have had this blog for a few months now, and honestly I feel like I have done very little DIY for you guys. Yes, I painted, but otherwise I am not really stepping outside my comfort zone. Well no more!! Today I am sharing a project I just completed, which I have been planning for a long time- my bedside table!

Now, a normal person has a table beside their bed on which to store their alarm clock, lamp, book, whatever. But my bed has to sit lengthwise along the wall- so I can't have a table to my side. When I first moved in, my dad found a tall shelf thing that I was able to use, but I couldn't fit a garbage can under it, which led to a cluttered look (I have no photo). It was also plastic, and kinda looked cheap (sorry Dad- it WAS a good find). Then I moved onto this system:

Haha, just a total mismash of junk to support my alarm clock! The issue with this set up is that that is my AC unit! There are vents down there that need airflow and this was not conducive to flow. But then those boxes had to be put back to use as boot boxes in the front hall closet, and now I had this:

I took away the laundry hamper and moved the bed so you can see what I am really working with:

Oh my. This will never do! See the problem is also that a standard height bedside table is too short to see over my pillows and I wanted something that my garbage can could go under, so I had to get creative. I decided to create a floating shelf! I picked up some brackets at Ikea, and my dad magically found the perfect sized piece of wood for the shelf.

First thing to do was mark off the height of the box (it was a decent height for what I needed, so I used it as my guide).


I then double checked for studs. I am working under the assumption that a builder would frame out around the air ducts and machinery in here and then drywall over the frame work. At least I hope so!

Who knew I had been sleeping next to a stud all these nights? ;)
Then I held up my first bracket to match up the top of the shelf with my mark and use a pencil to show where I needed to drill. I then drilled 'er in and screwed in over that! I used 1 5/8" screws that were made for wood behind drywall. I kept the first screw somewhat loose so that I could move the bracket after.


After that I shifted around the bracket to get it nice and level before screwing in the bottom screw.


Once that bracket was secured, I held the second bracket while leaving the shelf on them, so that I could get the overall shelf level as well.

And yes, I took photos while holding this all up!! I marked off where my screw needed to go and then repeated all these steps with the second bracket.


And then I was done!! I did not attach the shelf to the brackets, because once or twice a year the building performs maintenance on this unit and need access to the panel. The panel lifts up and out, so I do not think the brackets will be in the way (I hope!).


There is lots of room for airflow now! I know my alarm clock looks way to big for this (it is) but I actually intend to sell this system and get a smaller alarm clock. I rarely ever plug my ipod into this sucker, so I don't think I need such a big alarm clock. It also has a really bright light, which drives me nuts!

So after about 5 minutes, the unfinished look of that shelf started to drive me nuts. I do plan on eventually painting and finishing the whole thing, but until then I needed to prettify it a bit. And what do I do to prettify things? I GIFT WRAP IT! :D
Happy newbedsidetable to me!
And now that I had more shelf space, I decided to bring some light into the space! I used to have a light hung from the ceiling, but I haven't reinstalled it since painting and I now I am walking back and forth to the main light, and that switch is by the hallway, so it is annoying. I do read by Ipad at night, so I don't need a reading light, but for finding pajamas and stuff it is handy.


Ta-da! I left the lamp cord in front so that I can reach the switch easily. I hate lamps with cord switches. So annoying.

And what happened to the little red table? Well, it went back to where it originally lived when I moved in:

Oh ya! Now I have a place to keep my traffic-watching snacks. I have actually been using my patio more this summer, but more often than not I will be found on the rooftop patio, working on my tan (ok, I wear sunscreen, but a girl can dream, right?).

I hope you all liked my new project! This was my first time using a drill by myself and not screwing up!! And it is MY new-to-me drill! I always wanted a drill, so I was very excited when my dad gave me his old one. At first it didn't run well, and I charged the battery and it STILL didn't run well...but then I charged the 2nd battery and she purred like a tiger! yay!!

Monday, May 28, 2012

Customizing Furniture

So you have moved into your first place- maybe it is a dorm, an apartment, or a new house with a new spouse....but, your budget only allows for ramen noodles and putting your car up on blocks. How on earth can you have custom furniture? Your whole place just ends up looking like an Ikea catalogue- and the lower end IKEA pages at that. It can feel depressing because you hate having such plain, yet economical, furniture. Well I am here to tell you that it doesn't have to be that way- you can customize all that Ikea furniture and make your place much more appealing! Here are some tips

1. Paint it!


I covered this one in my Rast hack post! A lot of Ikea furniture comes in a raw wood version. You can easily paint it to make it look like a unique piece! And yes, I am still picking a new colour for this- I will share later!

2. Change the hardware
This one can make a world of difference. Ikea furniture often comes with plain wooden handles. By switching it out with some fun knobs or pulls, you can really make it look more high-end. On my armoire, I changed the hardware from chunky wooden ones to metal pulls. Sometimes hardware is expensive, but you just got to keep an eye out- I got these pulls for under $2 each!

3. Match the hardware


You will often accumulate your Ikea over time and through sales and donations- so it is rare that everything will be from the same line! My TV stand came with nice knobs, but they were a dark oil rubbed bronze colour. By switching them out with brushed nickel, it ties the TV stand in with the armoire and dresser, and even the handles in the kitchen! It also helps that both the TV stand and the dresser/armoire set have the same chunky feet.

4. Customize the function


Sometimes it can be hard to find the perfect piece of furniture in your budget. But with an investment of a couple of dollars in hardware, you can customize the function of a cheap Ikea piece. The brackets I bought to make this dresser fit my boots only cost about $2!

5. Be creative!


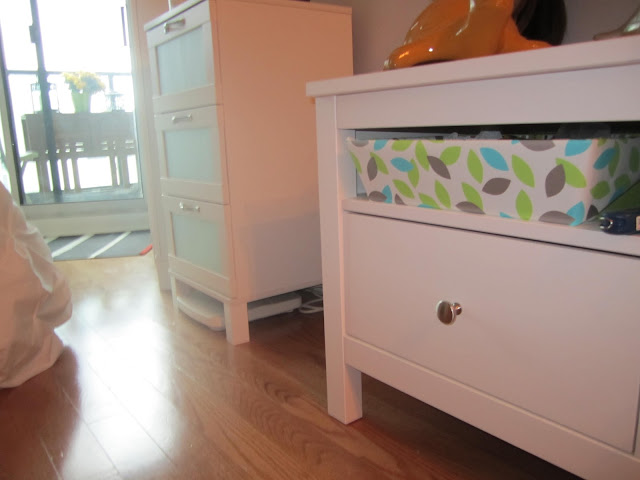
Have some fun and make an existing feel fresh and maybe more functional! I picked my armoire for a couple of reasons- they were cheap and short (the ceiling is only about 7 feet under the bulkhead). The double one was only $100 and the skinny shelving one was $90. But they had see through fronts that just looked messy, no matter how organized my clothes were. So I used wrapping paper to make it more fun and functional! The best part is that I can change the paper whenever I want to re-do my colour scheme!

I hope this post will give you some motivation to customize your Ikea stuff. I can't possibly leave you, however, without telling you about www.ikeahackers.net. I have gotten so much inspiration from looking at the customization jobs that people have done to their Ikea furniture! There are a lot of great tutorials for transforming Ikea to look like high-end furniture. If you have completed an Ikea Hack, please share!

Friday, May 25, 2012

Sewing 102: Actually making something!

So at Fabricland, I had purchased some material to try my hand at actually making something- and outfit for my niece! Lisa and I oohed and ahhed over all the cute fabrics for little girls, but eventually we settled on this lovely navy polka-dot material. I purchased double the required amount, just in case. It was on sale for 30% off so I got 2 metres for $16.

I figured it would be smart to start with something simple, as I hadn't sewed from a pattern in about , oh, nine years?! At that time I had made an amazing pair of pajamas with elastic draw string, pockets, piping, etc...I figured I would pick it up fast. So I picked up a pattern at Fabricland that said it was "very easy".

FAMOUS LAST WORDS!!


I planned on making version A- the red one on this pattern. I chose to use the 9 month old size, since my niece is a big girl, and I wanted to make sure it would fit!

First thing first, I had to wash the material to make sure it was pre-shrunk (it was cotton) and happily the colour didn't bleed in the wash!

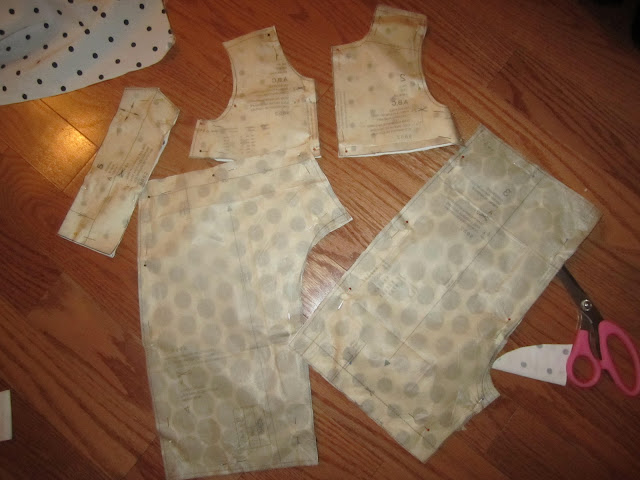
While it was washing, I got to work cutting out my pattern pieces. This outfit only involved 5 pieces (but I ended up not doing the ties, so it was more like 4 pieces).

What a cute outfit!!

Once the materials was washed and dried, I needed to iron the material to make it crisp again, and iron the pattern pieces so that they lie flat (make sure you iron these on low, with no steam!) I set up my ironing station in the hall near where I was working, because you have to iron a lot when sewing.


After this, I laid out my pieces, as per the instructions, on my material. This pattern required you to fold the fabric and cut some pieces on the fold. It also helps to use folded material because most patterns call for two of everything. The pattern also said to pin the patterns upside down on the wrong side of the fabric. I was careful to follow the directions so that I wouldn't screw up (FAMOUS LAST WORDS).


The placing here looks a little weird and "waste of space" but it is because I was trying to work with the pattern.

I would later find out that I did the pattern on the pants upside down. Even thought I spent probably an hour on laying it out, I still screwed up. sigh. This is why I didn't want to buy material that had to go in a certain direction. Solid prints or prints with randomness are the best choices for beginners! Also, check out my sexy new pink fabric scissors! I just cut along the size I wanted...I may go back to get this pattern again so that I can reuse it when my niece is older. I am not sure how to cut a smaller size out of a bigger size without ruining the pattern- can someone fill me in?

Next I had to actually sew something!! Here I am sewing the sides of the top:

After you sew a seam, you have to iron the seam open so that it will lie flat later on:

Around this point is when the pattern stopped making sense. I was so lost until I figured out I needed two more pieces of the top.

These were honestly the instructions for the top. It should be noted that I do not know what "baste" or "top stitch" means. It was at this point that I realized I had never sewn anything without my teacher there to help! uh-oh!

Eventually I figured out that I was supposed to have TWO tops and then the instructions made more sense. haha

But then I got to pants.

It just gives you one photo and a short sentence and somehow this turns into pants??


Then I realized that I had the pants upside down the whole time! The wider part at the top is actually the pant legs and the thinner part was the giant crotch. Despite staring at the photo on the package many times, this never occurred to me. Hence why my pattern will end up upside down from how I wanted it. I could have recut it, but it was midnight by this point and I just wanted to get 'er done.

Pants!!

Then I had to sew the hems. I got very lazy and just eyeballed it. I figure the baby can't walk, so no one will notice- right? haha. I just made sure to keep the stitching even from the hemline, and you really can't tell.


The last step was to put on the snaps for the shoulders. This involved a hammer, and I sure felt bad for my neighbours since I was hammering in the middle of the night, but oh well :) To add the snaps, you need to use this little tool that I picked up and Fabricland. Once end helps punch the sharp bits though the fabric (pictured) and then you place the snap over the pointy things, turn the device upside down, and hammer away!


I took out my aggression for this project on this unfortunate snap:


Then finally, FINALLY, I had finished. Yes, I had thrown the pattern to the wind near the end and just attached the top to the pants in a way that made sense to me, but I have to say I am DARN proud of this outfit, even with the upside down pattern. I sure hope it holds up!!


It is laying a little funny because I wanted to show that it was pants and not a skirt! I just LOVE it. I need to make an auntie-sized one to wear with her! haha. I actually have tons of material left over, so I think I may attempt a dress version of this one day! First thing to do, though, would be to see if this will fit. The baby's butt has to fit through the top because it has no zippers or snaps on the back. 

Finally, I used a baggie to collect all the pieces of the pattern (it comes with a few versions so all those pattern pieces needed to be saved too) cause there was no way I would fit it all back in the original package.


Man, this post doesn't even describe the headache of making this "very easy" pattern. I think I might have to sign up for a sewing course, if only to learn to translate the patterns!! This whole project took about 4 hours from start to finish- all for someone who will just throw up on it :)
Pin It button on image hover