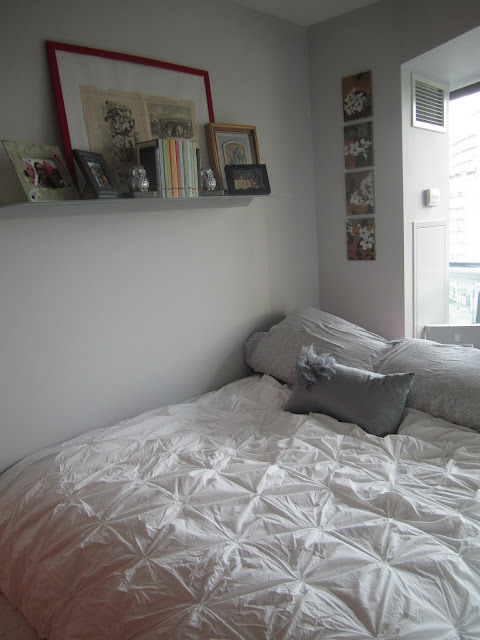
So Saturday night I finished up the main wall and the bulkhead over the kitchen. The lighting wasn't great so I didn't take before and after photos at that time. Sunday morning I woke up SO early and was raring to go and get this project finished. First thing to do was clean up the living room so that I could move the bed into the living room. Here was the reality for the next few hours. It was crazy:
When it came time to paint the bulkhead over the TV, I totally just stood on the bed. Hahaha. Not recommended, but I was careful and there were no accidents!
To get the bedroom ready, I had to remove the light, which I had hung up with Command Strip cord thingies. I knew now I had to get this done before it got dark because this was the only light back here!
All taped up and ready to go! I didn't take down the base to the shelf because it was very difficult to get up (there is cement right behind the drywall) and I was afraid I would never be able to reinstall! I also left up the brackets for the blinds because they require special drywall screws and I didn't want to have to go buy more.
This area below was the part I was not looking forward to. This was the most awkward corner EVER. It is very narrow and deep and you can only fit in one arm at a time. I didn't plan this out and I ended up painting the A/C unit first- soooo the whole front of me got painted when I had to reach into the corner. hahaha. Live and learn!
This is how I lazily protected my stuff when painting the bulkhead. hahaha
Once the bedroom area dried, I moved the bed back (but I was careful to not touch the walls just yet) and then moved the armoire, dresser, and TV stand out to access the accent wall. I haven't really seen this whole wall since I moved in- so it was pretty neat! Here is the last part of my window that doesn't even have blinds because it is behind the armoire:
The wall behind the tv is shown below. The paint along the top is because I already did the bulkhead. As I was going to prime and paint this wall the same colour as the bulkhead, I didn't worry about painting onto this wall as I went.
The strip of painters tape was to catch the sanding dust as it falls. Once you are done, you just carefully pull off the tape- no mess!!
I then primed the wall to get ready to paint! I didn't buy paint & primer in one paint, as my walls were white. So I picked up a quart of primer for this wall. I BARELY had enough! Luckily primer doesn't have to be perfect! Also, the primer stunk to high heaven and I swear the chemicals in the vapors are responsible for the horrible eczema blowout on my legs that evening. So much itchiness and pain :(
Finally, FINALLY, I was done painting. It was early evening at this point, but it took me awhile to clean everything up and rehang the artwork. I also needed to clean all the painting supplies and that stuff does NOT come clean.
Remember these before photos?
GET READY FOR AFTER PHOTOS!!
The colour is so subtle at some times, and so different at others. I also find that it sometimes looks blue or purple under certain lights. I am loving it. While I was painting I was a little disappointed that it wasn't such a big impact (considering all the work it took) but once it was all completed the place just looks so huge and airy! And strangely feminine, which I am LOVING.
Here is a closeup with the warm flooring and cool walls. I am loving this juxtaposition:
I hope you like it too! Because I am NOT repainting. In fact, I am retiring from painting. My muscles demand it of me.
Tomorrow I will be showing some tips for taping off your room- tune back in at 8:00am!


that looks fabulous!!! and wow -- a lot of work! great tip about using the painter's tape to catch dust!! thanks for sharing!
ReplyDeleteThanks! I think I stole that tip from another blog, probably Young House Love.
DeleteJust thought I would suggest the colour! It is a great pale grey